A Comprehensive Guide on How to Grow Cannas: Unleashing the Beauty of These Vibrant Blooms
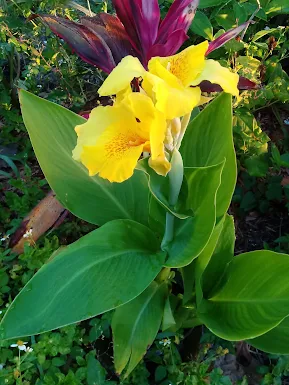
Cannas, with their stunning blooms, are a popular choice for garden enthusiasts looking to add a touch of tropical flair to their outdoor spaces. These versatile plants are relatively easy to grow and can thrive in a variety of climates. In this blog post, we will provide you with a comprehensive guide on how to grow cannas successfully, from selecting the right variety to caring for them throughout the growing season. So, let’s dive in and unlock the secrets to cultivating these magnificent plants!
Choosing the Right Variety: Before you start growing cannas, it’s essential to choose the right variety that suits your preferences and climate. Cannas come in a wide range of colors, sizes, and foliage patterns, allowing you to create a visually appealing garden. Some popular varieties include ‘Tropicanna,’ ‘Pretoria,’ and ‘Australia.’
Consider your climate and the amount of sunlight your garden receives. While most cannas prefer full sun, some varieties, such as the darker leaved Tropicannas, can tolerate partial shade. Additionally, take into account the height and spread of the plants, ensuring they fit well within your garden space.
Preparing the Soil:
Cannas thrive in well-draining soil that is rich in organic matter. Start by preparing the soil by removing any weeds, rocks, or debris. Loosen the soil to a depth of 4-6 inches and incorporate compost or well-rotted manure to improve its fertility and drainage.
Planting Cannas:
Cannas can be planted either from rhizomes or seeds. Rhizomes are the most common method of propagation. Plant the rhizomes horizontally, about 4-6 inches deep, with the eyes facing up. Space them 1-2 feet apart to allow for proper growth and airflow.
If you choose to grow cannas from seeds, start them indoors 8-10 weeks before the last frost date. Sow the seeds in a well-draining potting mix, keeping them moist until they germinate. Transplant the seedlings outdoors once the danger of frost has passed.
Watering and Fertilizing: Cannas require regular watering, especially during dry spells. Keep the soil consistently moist but avoid overwatering, as it can lead to root rot. Water more often, or even daily, in hot dry weather. Mulching around the plants can help retain moisture and suppress weed growth.
Fertilize cannas every 4-6 weeks during the growing season with a balanced, slow-release fertilizer. Alternatively, you can use a liquid fertilizer diluted according to the manufacturer’s instructions. Avoid excessive nitrogen, as it can promote foliage growth at the expense of flower production.
At Eat the Sand, we grow our cannas in one gallon pots in wicking beds. First, get a one gallon or larger pot and line the bottom of the pot with dead leaves and mulch. Then place the rhizome in the pot and stuff as much rabbit manure as possible around the rhizome, leaving as few air pockets as possible. Then water the rhizomes thoroughly, adding more manure reporting. Place the newly potted canna in a wicking bed, making sure that it constantly has water. We use duck effluent in our wicking beds. The canna will grow rapidly and flower quickly, and then need prompt repotting. By using this method we get 2-3 harvests of leaves and rhizome per pot per year. We feed the leaves and rhizomes to the ducks and rabbits.
Pruning and Maintenance:
Regular maintenance is crucial for healthy cannas. Remove any dead or damaged leaves to prevent the spread of diseases. After the first frost, cut back the foliage to about 4-6 inches above the ground. This will help protect the rhizomes during winter.
Overwintering Cannas:
In colder climates, cannas need to be protected during winter. Dig up the rhizomes after the foliage has been cut back and gently remove excess soil. Store them in a cool, dry place, such as a basement or garage, in a container filled with peat moss or vermiculite. Check them periodically for any signs of rot or drying out.
Conclusion:
Growing cannas can be a rewarding experience, as these plants offer a burst of color and tropical vibes to any garden. By following the steps outlined in this guide, you’ll be well on your way to cultivating healthy and vibrant cannas that will be the envy of your neighborhood. Happy gardening!
